Again...rain.
The day started out all sunshiny. Scarlette was to receive her Japanese Compulsory Inspection at 12:20 p.m. but the guy showed about an hour early to try to avoid the rain. The inspection was pretty light. Although Scarlette needs a ventilation hole put in by her fuel tank and an anchor light at the top of the mast, she still passed inspection.
I'm supposed to pickup the title tomorrow afternoon with her official name change!
Was able to get some sanding done on the front toe rails, peeled some glue off the old main hatch and did some re-varnishing of the main hatch.
 Beam toe rail starboard side. (No sanding, funny green stuff growing on end.)

Bow toe rail starboard side. (After sanding funny green stuff off.)
 New meets old. A freshly sanded bow toe rail meets an unsanded beam toe rail.

Glue left overs underneath main hatch threshold piece. Once the varnish dries, I'll be using Guerilla Glue and two clamps to fasten the varnished piece to the main hatch.
Had to leave Scarlette open though...not something I wanted to do but because of the rain, I didn't want to redo the varnish job I already had to redo.
Kinda tired today as I was up late working on the main website for Scarlette at http://www.scarletteboat.com/.
Also stopped by my old office and had Bangee agree to make me a new logo and name and Rey Ramon agreed to shoot pictures once I get Scarlette underway.
Despite the rain...didn't seem like I got much done, but I did.
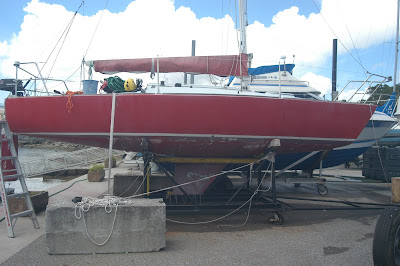
 Got a good strip done of the bow to the trailer up to the keel. The center part of the ship is really hard to strip. My guess is there is more paint there. It's basically three coats I'm stripping. Two layers of red and one primer grey.
  And was able to strip the port side of the keel. This went a lot faster then the starboard side. I'm getting better at this paint stripping. I did ask myself several times today, why am I doing this again. Doubt I'll do this for a while. Next year, It'll just be a bottom sand and repaint. You can see the small repair job, I had done also in this photo. It's the square to the very left of the photo right under the water line.


 Beam toe rail starboard side. (No sanding, funny green stuff growing on end.)
 New meets old. A freshly sanded bow toe rail meets an unsanded beam toe rail.


